Recipe of Ultimate Shanghai Spinach soup 上汤菠菜 #anti-flu##Spring
receipe#

Recipe of Ultimate Shanghai Spinach soup 上汤菠菜 #anti-flu##Spring receipe#

Shanghai Spinach soup 上汤菠菜 #anti-flu##Spring receipe#.

Shanghai Spinach soup 上汤菠菜 #anti-flu##Spring receipe#

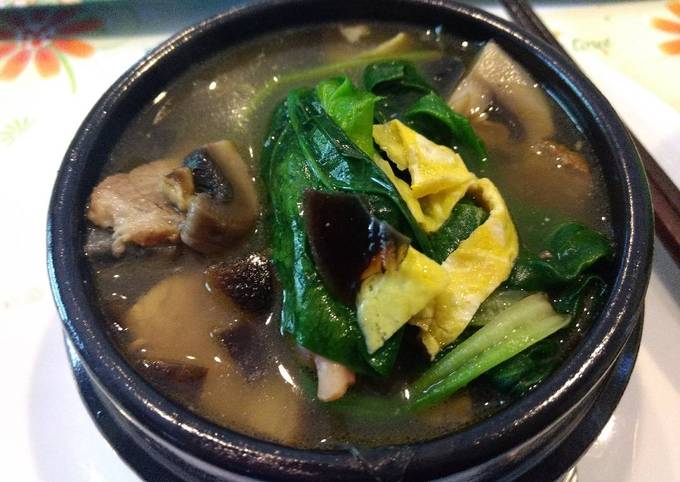
Hello everybody, hope you are having an incredible day today. Today, I will show you a way to make a special dish, shanghai spinach soup 上汤菠菜 #anti-flu##spring receipe#. It is one of my favorites food recipes. This time, I'm gonna make it a bit unique. This is gonna smell and look delicious.

Shanghai Spinach soup 上汤菠菜 #anti-flu##Spring receipe# is one of the most well liked of recent trending meals on earth. It is enjoyed by millions daily. It's simple, it's fast, it tastes delicious. They're fine and they look wonderful. Shanghai Spinach soup 上汤菠菜 #anti-flu##Spring receipe# is something that I have loved my whole life.

To begin with this particular recipe, we have to first prepare a few ingredients. You can have shanghai spinach soup 上汤菠菜 #anti-flu##spring receipe# using 7 ingredients and 8 steps. Here is how you can achieve it.

The ingredients needed to make Shanghai Spinach soup 上汤菠菜 #anti-flu##Spring receipe#:

  1. {Take 1 bunch of whole Spinach.
  2. {Prepare 1 of pasture raised egg.
  3. {Take 2 of thousand-year-old eggs, optional.
  4. {Get 1/4 cup of homemade cured ham.
  5. {Make ready 2 tsp of dried salted shrimp.
  6. {Take 2 of white button mushrooms.
  7. {Take 4 of garlic cloves.

Instructions to make Shanghai Spinach soup 上汤菠菜 #anti-flu##Spring receipe#:

  1. Soak Spinach in water with a Tsp baking soda added for about 5 minutes before rinse them in running water..
  2. Roate garlic in olive oil on very low heat until golden..
  3. Make a thin egg crepe and slice it into 1/4 inch in width. Separate thousand-year-old egg white from its yoke and cut them into cubes. These eggs are invented by ancient Chinese using wood ashes to cure fresh duck eggs making the egg white protein able to digest by elder and kids. Escape this step or replace it with hard boiled eggs..
  4. Bring the stock plus 2 cups of water into a boil..
  5. Add mushrooms, cured ham, garlic, egg crepe strips and thousand-year-old egg white. Simmer for about 5 minutes..
  6. In the meantime, saute spinach in a Tsp of water just after it withers. It takes only seconds. Arrange them one by one in a bowl..
  7. Season the broth before pouring it onto spinach. Serve with a slice of sourdough bread or a bowl of sprouted multigrain rice. Super delicious with a perfect balance of nutrients but not greasy at all..
  8. To make it a meal soup, proteins such as chicken or turkey sausage can be added. It's better not adding strong flavor meat such as beef for it may overpower the delicacy of the spinach..

So that's going to wrap this up with this exceptional food shanghai spinach soup 上汤菠菜 #anti-flu##spring receipe# recipe. Thanks so much for reading. I am sure that you can make this at home. There's gonna be interesting food at home recipes coming up. Don't forget to save this page in your browser, and share it to your loved ones, colleague and friends. Thank you for reading. Go on get cooking!

How to Make Perfect Crock pot pork chops and gravy

How to Make Perfect Crock pot pork chops and gravy

Crock pot pork chops and gravy. Remove your pork chops from your crock pot, place in a serving dish, give your gravy a good stir and pour over your pork chops in your serving dish. The pork chops slow cook in a delicious creamy savory sauce that you will love! We love easy dinners that can be made in the Crock Pot or Instant Pot.

Crock pot pork chops and gravy To thicken gravy, first carefully remove meat from slow A simple Crock-Pot meal that results in tender fall-off-the-bone pork and a delicious comforting gravy, all will LOVE! INSTANT POT Pork Chops and Rice Our crock pot pork chops with gravy are tender and delicious.

Hello everybody, it's Drew, welcome to my recipe site. Today, we're going to prepare a distinctive dish, crock pot pork chops and gravy. It is one of my favorites food recipes. For mine, I am going to make it a bit tasty. This is gonna smell and look delicious.

Remove your pork chops from your crock pot, place in a serving dish, give your gravy a good stir and pour over your pork chops in your serving dish. The pork chops slow cook in a delicious creamy savory sauce that you will love! We love easy dinners that can be made in the Crock Pot or Instant Pot.

Crock pot pork chops and gravy is one of the most well liked of current trending foods on earth. It's appreciated by millions daily. It's simple, it is fast, it tastes yummy. Crock pot pork chops and gravy is something which I have loved my entire life. They are nice and they look fantastic.

To get started with this recipe, we have to first prepare a few ingredients. You can have crock pot pork chops and gravy using 7 ingredients and 1 steps. Here is how you can achieve that.

The ingredients needed to make Crock pot pork chops and gravy:

  1. {Get 2-4 of thick cut bone in loin pork chops.
  2. {Make ready 1 of onion cut in half then sliced.
  3. {Get 2 of whole garlic cloves smashed.
  4. {Take 2 cups of beef broth.
  5. {Get 2 tbs. of Butter.
  6. {Prepare 1/2 of tbl. Red wine vinegar.
  7. {Get 1/4 cup of flour.

This is an easy slow cooker pork chops recipe that you can set and forget until supper time. These crock pot pork chops are a perfect example! Growing up, my mom always made pork chops because it's my dad's favorite dinner. CROCK POT PORK CHOPS Like this recipe?

Instructions to make Crock pot pork chops and gravy:

  1. Rub chops with Kosher salt and pepper. Brown chops in skillit with 1 tbs. Olive oil until golden brown. Layer chops in sprayed crock with onions. Add butter to skillit on med. High heat stir until deglazed. Add flour and stir with slotted spoon for about 30 seconds until it gets bubbly. Add broth and keep stiring until it thickens and bubbles. Add garlic and red wine vinegar. Pour over chops and onion. Cover and cook on low for 4 to 5 hours..

Pin it to your MAIN DISH pinboard! These pork chops are moist, tender, and practically drowning in a delicious gravy. They've actually turned into rainy day comfort food in our house (and I might just. Crockpot Pork Chops and GravyStockpiling Moms. Easy Crock Pot Pork ChopsRecipes That Crock. mushrooms, pork chops, sherry, cream of mushroom soup.

So that's going to wrap it up with this exceptional food crock pot pork chops and gravy recipe. Thank you very much for your time. I'm sure that you will make this at home. There is gonna be more interesting food in home recipes coming up. Don't forget to save this page in your browser, and share it to your family, friends and colleague. Thanks again for reading. Go on get cooking!

Step-by-Step Guide to Make Super Quick Homemade Student Meal: Japanese
Chicken Chop Rice (Katsu Don)

Step-by-Step Guide to Make Super Quick Homemade Student Meal: Japanese Chicken Chop Rice (Katsu Don)

Student Meal: Japanese Chicken Chop Rice (Katsu Don).

Student Meal: Japanese Chicken Chop Rice (Katsu Don)

Hello everybody, it is Brad, welcome to my recipe site. Today, I'm gonna show you how to prepare a special dish, student meal: japanese chicken chop rice (katsu don). It is one of my favorites. This time, I will make it a bit unique. This will be really delicious.

Student Meal: Japanese Chicken Chop Rice (Katsu Don) is one of the most well liked of current trending foods on earth. It is simple, it's fast, it tastes delicious. It is appreciated by millions daily. They are nice and they look wonderful. Student Meal: Japanese Chicken Chop Rice (Katsu Don) is something which I have loved my entire life.

To get started with this recipe, we have to prepare a few ingredients. You can cook student meal: japanese chicken chop rice (katsu don) using 17 ingredients and 3 steps. Here is how you cook that.

The ingredients needed to make Student Meal: Japanese Chicken Chop Rice (Katsu Don):

  1. {Take 1 pc of Chicken Thigh.
  2. {Get 1 cup of Cooked Rice.
  3. {Make ready 1 cup of Cooking Oil (shallow frying).
  4. {Prepare 1/2 cup of Panko breadcrumbs.
  5. {Make ready of Marinade (mix in a bowl);.
  6. {Make ready 1 pc of Egg.
  7. {Take 2 Tbsp of Corn Flour.
  8. {Prepare 1-2 g of Salt (1 or 2 pinch).
  9. {Make ready of Sauce.
  10. {Get 1/3 cup of Water.
  11. {Make ready 1 Tbsp of Kikkoman Soy Sauce.
  12. {Get 1 g of Dashi (1 pinch).
  13. {Make ready 70 g of Onions (slice or chopped).
  14. {Prepare 30 g of Spring Onions (chopped finely, garnish).
  15. {Make ready of Optional;.
  16. {Take 2 tsp of Vinegar.
  17. {Get 1 tsp of Sugar.

Instructions to make Student Meal: Japanese Chicken Chop Rice (Katsu Don):

  1. CHICKEN; Marinate the chicken with the egg, flour, salt and pepper for 30 minutes minimum. Prepare 1 cup of cooking oil on medium heat for shallow frying. When ready, coat the chicken in Panko and fry it 2-3minutes each side or until golden brown. Remove and set aside..
  2. SAUCE; In a saucepan, add water, soy sauce, dashi, (vinegar and sugar if you want), as well as onions. Bring it to a boil, then cover with a lid and cook for 1 minute..
  3. ASSEMBLY; Next, lay the chicken flat on top of the onions and pour in the egg. Cover with a lid and cook for 10 seconds. Turn off the heat. Prepare a bowl of rice and lay the chicken and the sauce on top of the rice to serve. Garnish with spring onions..

So that is going to wrap this up for this special food student meal: japanese chicken chop rice (katsu don) recipe. Thank you very much for your time. I'm confident that you will make this at home. There's gonna be interesting food at home recipes coming up. Don't forget to save this page on your browser, and share it to your family, colleague and friends. Thank you for reading. Go on get cooking!

Easiest Way to Prepare Super Quick Homemade Penne pasta salad with
zucchini and olives

Easiest Way to Prepare Super Quick Homemade Penne pasta salad with zucchini and olives

Penne pasta salad with zucchini and olives.

Penne pasta salad with zucchini and olives

Hello everybody, it's me again, Dan, welcome to my recipe page. Today, I'm gonna show you how to make a special dish, penne pasta salad with zucchini and olives. It is one of my favorites. This time, I will make it a bit tasty. This is gonna smell and look delicious.

Penne pasta salad with zucchini and olives is one of the most well liked of current trending meals on earth. It is simple, it is fast, it tastes yummy. It's enjoyed by millions daily. Penne pasta salad with zucchini and olives is something that I've loved my whole life. They are nice and they look wonderful.

To get started with this recipe, we have to prepare a few ingredients. You can have penne pasta salad with zucchini and olives using 10 ingredients and 5 steps. Here is how you can achieve that.

The ingredients needed to make Penne pasta salad with zucchini and olives:

  1. {Take 1 lbs of penne pasta.
  2. {Make ready 1 pint of cherry tomatoes.
  3. {Make ready 1 of medium sized zucchini.
  4. {Make ready 1/2 of or more red onion.
  5. {Prepare 1/3 cup of pitted olives.
  6. {Get of Dill.
  7. {Prepare 2-3 tablespoons of red wine vinegar.
  8. {Take 3-4 tablespoons of olive oil.
  9. {Make ready of Feta cheese (optional).
  10. {Make ready of Salt, pepper.

Steps to make Penne pasta salad with zucchini and olives:

  1. Boil penne pasta in salted water according to package instructions..
  2. Using vegetable peeler thinly shave zucchini and place it in a colander..
  3. Cut tomatoes in half, dice onions, olives and chop dill..
  4. When pasta is ready drain it over zucchini to wilt it a little. Rinse with cold water..
  5. Mix all ingredients including vinegar and oil together. Add salt and pepper to taste. Sprinkle feta on top if using..

So that is going to wrap it up with this special food penne pasta salad with zucchini and olives recipe. Thank you very much for your time. I'm confident that you will make this at home. There is gonna be interesting food at home recipes coming up. Remember to bookmark this page on your browser, and share it to your loved ones, colleague and friends. Thank you for reading. Go on get cooking!

How to Make Quick healthy salad

How to Make Quick healthy salad

healthy salad.

healthy salad

Hello everybody, it's Louise, welcome to our recipe page. Today, I'm gonna show you how to make a special dish, healthy salad. It is one of my favorites food recipes. For mine, I will make it a bit unique. This is gonna smell and look delicious.

healthy salad is one of the most well liked of recent trending foods in the world. It is simple, it's fast, it tastes yummy. It is enjoyed by millions every day. They're nice and they look wonderful. healthy salad is something which I have loved my entire life.

To get started with this particular recipe, we have to prepare a few ingredients. You can have healthy salad using 6 ingredients and 2 steps. Here is how you can achieve that.

The ingredients needed to make healthy salad:

  1. {Get of salad.
  2. {Prepare 1 packages of lettuce.
  3. {Take 1 bunch of cranberries.
  4. {Get 1 dozen of chopped cuccumber.
  5. {Take 1 dozen of choped up slices of cappsican.
  6. {Get 4 of eggs.

Instructions to make healthy salad:

  1. add all of the above and mix.
  2. put in a bowl like so and enjoy!.

So that's going to wrap it up for this exceptional food healthy salad recipe. Thanks so much for your time. I'm confident that you can make this at home. There is gonna be more interesting food at home recipes coming up. Remember to bookmark this page on your browser, and share it to your loved ones, friends and colleague. Thank you for reading. Go on get cooking!

Step-by-Step Guide to Prepare Perfect Honey-Glazes Chicken Stir Fry

Step-by-Step Guide to Prepare Perfect Honey-Glazes Chicken Stir Fry

Honey-Glazes Chicken Stir Fry.

Honey-Glazes Chicken Stir Fry

Hello everybody, hope you are having an amazing day today. Today, I'm gonna show you how to make a distinctive dish, honey-glazes chicken stir fry. One of my favorites food recipes. For mine, I'm gonna make it a little bit tasty. This will be really delicious.

Honey-Glazes Chicken Stir Fry is one of the most favored of recent trending foods on earth. It's simple, it is fast, it tastes yummy. It's appreciated by millions daily. They are nice and they look wonderful. Honey-Glazes Chicken Stir Fry is something which I have loved my entire life.

To begin with this recipe, we have to prepare a few components. You can cook honey-glazes chicken stir fry using 9 ingredients and 6 steps. Here is how you cook it.

The ingredients needed to make Honey-Glazes Chicken Stir Fry:

  1. {Prepare 12 oz of skinless, boneless chicken breast halves or thighs.
  2. {Prepare 2 tbsp of honey.
  3. {Get 2 tbsp of vinegar.
  4. {Take 2 tbsp of orange juice.
  5. {Take 4 tsp of soy sauce.
  6. {Get 1 1/2 tsp of cornstarch.
  7. {Get 2 tbsp of olive oil.
  8. {Take 4 cup of cut up vegetables, such as broccoli, sweet pepper, onion and/or mushrooms.
  9. {Make ready 2 cup of hot cooked rice.

Steps to make Honey-Glazes Chicken Stir Fry:

  1. Cut chicken into bite-sized strips; set aside..
  2. For sauce, in a small bowl stir together honey, vinegar, orange juice, soy sauce, and for starch; set aside..
  3. Pour oil into a wok or large skillet. Heat over medium high heat. Add vegetables to wok; cook and stir for 3 to 4 minutes or until vegetables are crisp and tender. Remove vegetables from wok..
  4. Add chicken to wok; cook and stir until chicken is no longer pink. Push chicken to the center of wok. Stir sauce; add to the center of the wok. Cook and stir until thickened and bubbly..
  5. Return cooked vegetables to wok. Cook and stir about 1 minute more until heated through..
  6. Serve over rice..

So that is going to wrap it up for this exceptional food honey-glazes chicken stir fry recipe. Thanks so much for reading. I am confident that you will make this at home. There's gonna be interesting food in home recipes coming up. Don't forget to bookmark this page in your browser, and share it to your family, friends and colleague. Thanks again for reading. Go on get cooking!

Step-by-Step Guide to Make Perfect Orange Chicken🍊🍗🍛

Step-by-Step Guide to Make Perfect Orange Chicken🍊🍗🍛

Orange Chicken🍊🍗🍛.

Orange Chicken🍊🍗🍛

Hello everybody, it is Brad, welcome to our recipe site. Today, I will show you a way to make a special dish, orange chicken🍊🍗🍛. One of my favorites. For mine, I am going to make it a bit unique. This will be really delicious.

Orange Chicken🍊🍗🍛 is one of the most well liked of recent trending meals in the world. It is appreciated by millions every day. It's easy, it is fast, it tastes yummy. Orange Chicken🍊🍗🍛 is something which I have loved my whole life. They're fine and they look wonderful.

To get started with this particular recipe, we have to first prepare a few ingredients. You can have orange chicken🍊🍗🍛 using 21 ingredients and 15 steps. Here is how you cook that.

The ingredients needed to make Orange Chicken🍊🍗🍛:

  1. {Get 500 grams of chicken thighs/breast.
  2. {Prepare 1 cup of all-purpose flour.
  3. {Take 1/2 of corn flour.
  4. {Make ready 3/4 tsp of black pepper.
  5. {Get 1 tsp of salt.
  6. {Get 1,1 of /2 cup /as required water.
  7. {Take 1 tbs of cooking oil.
  8. {Make ready 1/2 of baking powder.
  9. {Get of Oil for frying.
  10. {Prepare of For orange sauce.
  11. {Take 2 of garlic cloves minced.
  12. {Prepare 3/4 tsp of ginger grated.
  13. {Make ready 1 cup of orange juice fresh.
  14. {Take 1/2 tsp of chilli flakes.
  15. {Get 1 tbs of soya sauce.
  16. {Take 1/3 cup of sugar.
  17. {Prepare 1/4 cup of white vinegar.
  18. {Get 1 tbs of green onion.
  19. {Prepare 1 tbs of cornstarch+1/4 cup water.
  20. {Take 1 tsp of sesame oil.
  21. {Prepare 1 tbs of sesame seeds.

Steps to make Orange Chicken🍊🍗🍛:

  1. Add flour in a mixing bowl and mix in cornflour salt n pepper.
  2. Make 1 inch cubes of chicken breast.
  3. Gradually stir in water cooking oil and then add in chicken pieces.
  4. Add baking powder and mix well cover it and let it rest for 15 minutes. Orange Chicken🍊🍗🍛
  5. Heat oil in a pan and deep fry all chicken pieces in batches. Orange Chicken🍊🍗🍛
  6. Remove from heat and keep aside.
  7. Make cornstarch slurry and keep aside.
  8. Drizzle sesame oil in same wok and add ginger n garlic.
  9. Fry for 1 minute then add chilli flakes.
  10. Now add orange juice and stir in.
  11. Add soya sauce vinegar and sugar mix well.
  12. Stir in cornstarch slurry and toss fried chicken pieces in sauce.
  13. Sprinkle some sesame seeds and garnish with green onions.
  14. Ready to enjoy😍😋 serve with fried rice or white rice (see recipe).
  15. My family loved it very much with fried rice.

So that is going to wrap this up with this special food orange chicken🍊🍗🍛 recipe. Thank you very much for reading. I'm confident that you can make this at home. There's gonna be more interesting food in home recipes coming up. Remember to save this page in your browser, and share it to your loved ones, colleague and friends. Thanks again for reading. Go on get cooking!

Easiest Way to Prepare Homemade Tuna Kimchi Sandwich 🥪

Easiest Way to Prepare Homemade Tuna Kimchi Sandwich 🥪

Tuna Kimchi Sandwich 🥪.

Tuna Kimchi Sandwich 🥪

Hey everyone, it's Brad, welcome to our recipe page. Today, we're going to prepare a distinctive dish, tuna kimchi sandwich 🥪. One of my favorites. For mine, I'm gonna make it a little bit tasty. This will be really delicious.

Tuna Kimchi Sandwich 🥪 is one of the most favored of recent trending foods in the world. It is appreciated by millions every day. It is easy, it's quick, it tastes yummy. Tuna Kimchi Sandwich 🥪 is something that I've loved my entire life. They are fine and they look fantastic.

To begin with this particular recipe, we have to first prepare a few components. You can have tuna kimchi sandwich 🥪 using 6 ingredients and 6 steps. Here is how you can achieve that.

The ingredients needed to make Tuna Kimchi Sandwich 🥪:

  1. {Make ready 1 of canned tuna.
  2. {Prepare 3 tbsp of kimchi.
  3. {Prepare 2 tbsp of tomato paste.
  4. {Get 1 of egg.
  5. {Prepare 2 slices of bread.
  6. {Make ready of Salt and pepper to taste.

Steps to make Tuna Kimchi Sandwich 🥪:

  1. Preheat oven to 350°F..
  2. Open canned tuna, drain the water or oil, then put the tuna in a bowl. Then add tomato paste and kimchi. Mix well..
  3. Crack the egg to another bowl. Add enough water to submerge the egg. Microwave for 1 min 30 seconds. Take out the poached egg from water and add to tuna mixture. Mix well..
  4. Place two slices of bread on a baking tray. Add the tuna mixture on one slice. Bake in oven for 5 minutes..
  5. Put the single slice on the other one. Cut the sandwich in half to serve. (Optional) Feel free to add lettuce or spinach in the sandwich too..
  6. Delicious tuna kimchi sandwich ready to serve!.

So that's going to wrap this up with this exceptional food tuna kimchi sandwich 🥪 recipe. Thanks so much for your time. I'm confident that you will make this at home. There is gonna be interesting food at home recipes coming up. Don't forget to bookmark this page in your browser, and share it to your family, friends and colleague. Thanks again for reading. Go on get cooking!

Simple Way to Prepare Quick Fat free chicken pad thai

Simple Way to Prepare Quick Fat free chicken pad thai

Fat free chicken pad thai.

Fat free chicken pad thai

Hey everyone, it's me, Dave, welcome to our recipe site. Today, we're going to prepare a distinctive dish, fat free chicken pad thai. One of my favorites. This time, I am going to make it a little bit unique. This will be really delicious.

Fat free chicken pad thai is one of the most well liked of recent trending foods in the world. It is appreciated by millions every day. It is easy, it is quick, it tastes delicious. They're nice and they look wonderful. Fat free chicken pad thai is something that I have loved my whole life.

To begin with this recipe, we must prepare a few ingredients. You can have fat free chicken pad thai using 14 ingredients and 6 steps. Here is how you cook that.

The ingredients needed to make Fat free chicken pad thai:

  1. {Prepare Pack of skinless chicken thighs.
  2. {Get 3 Tbsp of soy sauce.
  3. {Make ready of for the vegetables.
  4. {Prepare 1 of Large red onion chopped into petals.
  5. {Take 1 pack of pak choi.
  6. {Get 1 Tsp of 5 Spice.
  7. {Get 2 Tbsp of garlic and ginger paste.
  8. {Get of for the sauce.
  9. {Prepare 3 Tbsp of Granulated sugar.
  10. {Take 3 Tbsp of fish sauce.
  11. {Prepare 3 Tbsp of rice vinegar.
  12. {Take 2 Tbsp of soy sauce.
  13. {Prepare 1 Tbsp of chilli flakes.
  14. {Get of Noodles boiling in hotwater for 4min.

Instructions to make Fat free chicken pad thai:

  1. Add the soy sauce to the chicken and leave in the fridge for 3/4 Hours. Mix all the ingredients together for the sauce..
  2. Put the chicken in to a hot wok and cook until moist and nicely browned..
  3. Put the onion into a heated pan cook for 5mins if it starts to stick add a little water and stir, then add the garlic and ginger paste and 5 spice for 2mins then add the pak Choi until cooked..
  4. Now add the chicken to the cooked vegetables and give a loving stir and leave for a further 3/4 mins.
  5. Whilst the chicken and vegetables simmer away into boiling water add the noodles for 4mins.
  6. Adding all the noodles to the chicken and vegetables and also adding the sauce for a further 10min mixing all the ingredients..

So that's going to wrap it up with this special food fat free chicken pad thai recipe. Thank you very much for your time. I am sure that you will make this at home. There is gonna be interesting food at home recipes coming up. Remember to save this page in your browser, and share it to your loved ones, colleague and friends. Thanks again for reading. Go on get cooking!

Simple Way to Make Quick Indian Vadei with Creamy & Spicy Tomato Chutney

Simple Way to Make Quick Indian Vadei with Creamy & Spicy Tomato Chutney

Indian Vadei with Creamy & Spicy Tomato Chutney.

Indian Vadei with Creamy & Spicy Tomato Chutney

Hey everyone, I hope you're having an amazing day today. Today, I will show you a way to make a distinctive dish, indian vadei with creamy & spicy tomato chutney. It is one of my favorites food recipes. For mine, I am going to make it a little bit tasty. This is gonna smell and look delicious.

Indian Vadei with Creamy & Spicy Tomato Chutney is one of the most popular of recent trending foods in the world. It's appreciated by millions every day. It's simple, it's fast, it tastes yummy. Indian Vadei with Creamy & Spicy Tomato Chutney is something which I've loved my entire life. They are fine and they look fantastic.

To begin with this particular recipe, we have to first prepare a few components. You can have indian vadei with creamy & spicy tomato chutney using 17 ingredients and 3 steps. Here is how you cook it.

The ingredients needed to make Indian Vadei with Creamy & Spicy Tomato Chutney:

  1. {Take of A. Ulundu Vadei.
  2. {Take 200-250 g of Urad dhal.
  3. {Take 1 sprig of curry leaves - finely chopped.
  4. {Get 1 of green chili - finely chopped.
  5. {Make ready 1/3 c of finely chopped onion.
  6. {Make ready 1/8 tsp of - Hing / Asafetida - optional.
  7. {Get 1/2 tsp of cumin seeds - optional.
  8. {Make ready 1 tbsp of rice flour - optional.
  9. {Take As needed of - salt.
  10. {Prepare of B. Creamy Tomato Chutney 🍅 🫕.
  11. {Make ready 1 of big brown onion - sliced.
  12. {Get 4 of garlic - crushed.
  13. {Make ready 5 of bird eyed chilies (or less) - crushed.
  14. {Prepare 1 tbsp of cashewnuts.
  15. {Get 5 of tomatoes - diced.
  16. {Get 1 tsp of garam masala.
  17. {Get 2 tsp of / to taste - chicken seasoning powder.

Instructions to make Indian Vadei with Creamy & Spicy Tomato Chutney:

  1. A - Soak urad dhal for 2-3 hours. Blend soaked urad dhal in small batches. Try to use as little water as possible, by adding a tbsp of water first, only if needed. Keep blending, wiping clean the sides of the blender until you have a good fine thick consistency batter. Water is added only when necessary, a few tbsp at a time. Blend until you have fine and fluffy batter..
  2. Remove batter to a mixing bowl. Add the rest of the ingredients in A to the batter. Stir in circular motion until fluffy. This is to incorporate air into the batter. Next, heat enough oil in a pan for deep frying. Wet your palm. Take a tbsp of the batter and lightly shape into a ball with your wet palm. Make a hole using your thumb. Drop this shaped batter into hot oil. Over medium heat, Cook both sides until lightly browned. Remove and drain on kitchen towel. Serve with creamy tomato chutney..
  3. B - Heat 3 tbsp of oil in a pan. Sauté brown onion, garlic, bird eyed chilis and cashew nuts until aromatic and brown onion is well caramelized. Add chopped tomatoes, stir to combine and season with 2 tsp of chicken seasoning powder and a tsp of garam masala. Cook until tomato is just soft. Remove from the heat and leave to cool slightly. Transfer to a blender and blend to a smooth puree (without water). Serve..

So that is going to wrap it up for this special food indian vadei with creamy & spicy tomato chutney recipe. Thank you very much for your time. I am confident that you will make this at home. There is gonna be more interesting food in home recipes coming up. Remember to save this page on your browser, and share it to your family, friends and colleague. Thanks again for reading. Go on get cooking!

Recipe of Award-winning Sous Vide Dry Rub BBQ Chicken

Recipe of Award-winning Sous Vide Dry Rub BBQ Chicken

Sous Vide Dry Rub BBQ Chicken.

Sous Vide Dry Rub BBQ Chicken

Hey everyone, I hope you are having an amazing day today. Today, we're going to make a distinctive dish, sous vide dry rub bbq chicken. It is one of my favorites. This time, I'm gonna make it a little bit unique. This will be really delicious.

Sous Vide Dry Rub BBQ Chicken is one of the most well liked of current trending foods in the world. It is enjoyed by millions every day. It is simple, it's quick, it tastes delicious. They are fine and they look wonderful. Sous Vide Dry Rub BBQ Chicken is something that I've loved my entire life.

To begin with this particular recipe, we must prepare a few components. You can cook sous vide dry rub bbq chicken using 9 ingredients and 9 steps. Here is how you cook that.

The ingredients needed to make Sous Vide Dry Rub BBQ Chicken:

  1. {Make ready 3 TBSP of Light Brown Sugar.
  2. {Get 3 TBSP of Paprika.
  3. {Prepare 1 TBSP of Onion Powder.
  4. {Get 1 TBSP of Thyme.
  5. {Get 1.5 TSP of Garlic Powder.
  6. {Make ready 1 TSP of Cumin.
  7. {Take 0.75 TSP of Cayenne.
  8. {Make ready 1 LBS of Boneless Skinless Chicken Breast.
  9. {Make ready of Your Favorite BBQ Sauce (For Topping).

Instructions to make Sous Vide Dry Rub BBQ Chicken:

  1. Preheat sous vide to 149 degrees Fahrenheit and set timer for 55 minutes..
  2. Gently tenderize and then butterfly the chicken breast..
  3. Mix brown sugar, paprika, onion powder, thyme, garlic powder, cumin and cayenne thoroughly in a bowl..
  4. Rub mixture into chicken..
  5. Place chicken into a heavy bag and seal the bag removing any air. You can use a vacuum sealer but I prefer to use Ziploc freezer bags and the water immersion method..
  6. Once the water bath is ready, submerge the bags and clip then to the side. Cook for 55 minutes..
  7. Remove from water bath and bags..
  8. Heat up a touch of olive oil in a pan on the stove and place the chicken in for two minutes on each side for a crispy exterior..
  9. Remove from pan, plate and top with a touch of your favorite BBQ sauce. Enjoy!.

So that is going to wrap this up for this special food sous vide dry rub bbq chicken recipe. Thanks so much for reading. I am confident you will make this at home. There is gonna be interesting food in home recipes coming up. Remember to bookmark this page on your browser, and share it to your family, friends and colleague. Thanks again for reading. Go on get cooking!

Steps to Prepare Speedy Ham & Cheese Bake

Steps to Prepare Speedy Ham & Cheese Bake

Ham & Cheese Bake.

Ham & Cheese Bake

Hello everybody, hope you are having an amazing day today. Today, we're going to make a special dish, ham & cheese bake. It is one of my favorites. This time, I'm gonna make it a little bit tasty. This is gonna smell and look delicious.

Ham & Cheese Bake is one of the most popular of recent trending meals in the world. It's easy, it is fast, it tastes yummy. It is enjoyed by millions every day. They're nice and they look fantastic. Ham & Cheese Bake is something which I've loved my entire life.

To begin with this particular recipe, we have to prepare a few ingredients. You can have ham & cheese bake using 10 ingredients and 4 steps. Here is how you can achieve it.

The ingredients needed to make Ham & Cheese Bake:

  1. {Get 1/2 cup of gluten-free buscuit mix.
  2. {Get 1/2 cup of soy milk.
  3. {Take 1/2 tsp of salt.
  4. {Make ready 1/2 tsp of dry mustard.
  5. {Make ready 1/2 tsp of parsley flakes.
  6. {Prepare 1/4 tsp of pepper.
  7. {Take 6 of eggs.
  8. {Take 1 cup of diced ham.
  9. {Take 3/4 cup of shredded swiss cheese.
  10. {Get 1 can of diced potatoes.

Instructions to make Ham & Cheese Bake:

  1. Heat oven to 350°F..
  2. Grease 8x8x2 baking dish..
  3. Mix baking mix, milk, salt, mustard, parsley, pepper, & eggs with fork/whisk until uniform color. May need a little extra biscuit mix, but you don't want it to be a thick batter. Stir in remaining ingredients..
  4. Pour in baking dish. Bake for 45 minutes. Then serve..

So that is going to wrap it up with this exceptional food ham & cheese bake recipe. Thank you very much for your time. I'm confident you can make this at home. There is gonna be more interesting food in home recipes coming up. Remember to bookmark this page on your browser, and share it to your family, friends and colleague. Thank you for reading. Go on get cooking!

How to Make Speedy Pork and Ham Bread

How to Make Speedy Pork and Ham Bread

Pork and Ham Bread.

Pork and Ham Bread

Hello everybody, it is me again, Dan, welcome to my recipe page. Today, I'm gonna show you how to prepare a special dish, pork and ham bread. It is one of my favorites food recipes. For mine, I will make it a little bit tasty. This is gonna smell and look delicious.

Pork and Ham Bread is one of the most well liked of recent trending meals on earth. It's enjoyed by millions daily. It is simple, it is quick, it tastes yummy. They're fine and they look wonderful. Pork and Ham Bread is something which I've loved my entire life.

To begin with this recipe, we have to prepare a few ingredients. You can cook pork and ham bread using 10 ingredients and 3 steps. Here is how you can achieve it.

The ingredients needed to make Pork and Ham Bread:

  1. {Prepare 1 of small can of pork.ham.
  2. {Take 1 cup of flour.
  3. {Prepare 1 tsp of yeast.
  4. {Make ready 1 tsp of sugar.
  5. {Make ready 1/3 tsp of salt.
  6. {Prepare 1 of egg.
  7. {Take of Some sesame seeds.
  8. {Get of Fresh milk.
  9. {Take of Vanilla half tsp.
  10. {Prepare of Melted butter.

Instructions to make Pork and Ham Bread:

  1. Prepare the dough.by combining dry ings then the wet ings.Mix all and knead until soft.Then set aside and cover for an.hour to let it rise..
  2. Open the can of pork ham and slice it.Cut the dough in pieces and use a rolling pin to flat it.Then put the piece of pork and ham in the center and fold it..
  3. Then brush with egg wash the surface and sprinkle sesame seeds then bake for 20mins at 18 degrees.Once cook brush.it with melted butter..

So that's going to wrap this up with this exceptional food pork and ham bread recipe. Thanks so much for your time. I'm sure that you can make this at home. There's gonna be interesting food at home recipes coming up. Remember to save this page on your browser, and share it to your family, colleague and friends. Thank you for reading. Go on get cooking!

Easiest Way to Make Favorite Chinese Poached Chicken with Slow Cooker

Easiest Way to Make Favorite Chinese Poached Chicken with Slow Cooker

Chinese Poached Chicken with Slow Cooker.

Chinese Poached Chicken with Slow Cooker

Hello everybody, it is Jim, welcome to our recipe page. Today, we're going to prepare a special dish, chinese poached chicken with slow cooker. One of my favorites. This time, I'm gonna make it a little bit tasty. This will be really delicious.

Chinese Poached Chicken with Slow Cooker is one of the most popular of recent trending meals on earth. It's enjoyed by millions every day. It's simple, it's fast, it tastes yummy. Chinese Poached Chicken with Slow Cooker is something that I've loved my whole life. They are nice and they look wonderful.

To get started with this particular recipe, we have to prepare a few ingredients. You can have chinese poached chicken with slow cooker using 9 ingredients and 5 steps. Here is how you can achieve it.

The ingredients needed to make Chinese Poached Chicken with Slow Cooker:

  1. {Get 2 kg (4 lbs) of chicken thigh.
  2. {Prepare 5 cm (2 inches) of ginger, cut into 3 parts and then crushed.
  3. {Make ready 10 of garlic cloves, crushed.
  4. {Prepare 4 of green onion, the white part only, cut 1 inch.
  5. {Get 2-3 tsp of salt (according to taste).
  6. {Take 1 liter (1 quart) of water.
  7. {Prepare as needed of soy sauce.
  8. {Get 4 tablespoons of sesame oil.
  9. {Make ready 10 of garlic cloves, chopped.

Instructions to make Chinese Poached Chicken with Slow Cooker:

  1. Add water, ginger, garlic, scallions and salt to the slow cooker. Stir well. Add chicken. Put the slow cooker lid on, press the "low" button and set the timer for 4 hours..
  2. After 4 hours, check if the chicken has been cooked or not. Otherwise, cook for another hour (this depends on the size of the chicken)..
  3. Take the chicken out (save the broth for another use), brush the chicken with soy sauce..
  4. Heat sesame oil, saute the chopped garlic until golden brown. Keep stirring, don't let it get burnt. Pour the garlic and the oil over the chicken that has been brushed with soy sauce..
  5. Serve it with Hainanese rice (recipe 👉 https://cookpad.com/us/recipes/5403953-hainanese-rice-with-rice-cooker?via=sidebar-recipes) or warm white rice..

So that is going to wrap it up with this special food chinese poached chicken with slow cooker recipe. Thanks so much for your time. I'm sure you can make this at home. There is gonna be more interesting food in home recipes coming up. Remember to save this page on your browser, and share it to your loved ones, colleague and friends. Thanks again for reading. Go on get cooking!

Recipe of Speedy Kung Pao Chicken

Recipe of Speedy Kung Pao Chicken

Kung Pao Chicken.

Kung Pao Chicken

Hey everyone, it's Jim, welcome to my recipe site. Today, we're going to prepare a special dish, kung pao chicken. It is one of my favorites. For mine, I will make it a bit tasty. This is gonna smell and look delicious.

Kung Pao Chicken is one of the most popular of recent trending meals in the world. It is simple, it is quick, it tastes delicious. It is enjoyed by millions every day. They are nice and they look fantastic. Kung Pao Chicken is something which I have loved my whole life.

To begin with this recipe, we must prepare a few components. You can have kung pao chicken using 26 ingredients and 6 steps. Here is how you cook that.

The ingredients needed to make Kung Pao Chicken:

  1. {Prepare of Prep time 20 mints.
  2. {Take of Cooking time 10 mints.
  3. {Get of Total time 30 mints.
  4. {Make ready of Chicken Marinade:.
  5. {Make ready 1 1/2 kg of boneless chicken cut into cubes.
  6. {Make ready 2 tbsp of soy sauce.
  7. {Take 2 tsp of sesame oil.
  8. {Prepare 1 tsp of corn flour.
  9. {Get 1 tsp of black pepper.
  10. {Take of Gravy:.
  11. {Get 3 tsp of cornflour.
  12. {Make ready 5 tbsp of light soy sauce.
  13. {Get 1 tbsp of dark soy sauce.
  14. {Prepare 5 tbsp of sesame oil.
  15. {Take 1 tsp of black pepper.
  16. {Take 2 tbsp of sriracha sauce.
  17. {Prepare 3 tbsp of water.
  18. {Get 3 tbsp of honey.
  19. {Take 1 of medium onion finely chopped.
  20. {Take 1 tbsp of minced garlic.
  21. {Prepare 1 tbsp of minced ginger.
  22. {Take 6 of dried red chilies cut into halves and seeds removed.
  23. {Get 1 of red capsicum cut into 1" cubes.
  24. {Prepare 1 of green capsicum cut into 1" cubes.
  25. {Take 3 tbsp of fried peanuts for garnish.
  26. {Make ready 1 tbsp of finely chopped green onions for garnish.

Steps to make Kung Pao Chicken:

  1. Measure and prepare all ingredients. Marinate the chicken and keep aside or refrigerate until further use..
  2. Make cornflour slurry and keep aside too. Fry peanuts in oil on a low flame till golden..
  3. In a separate bowl mix together water, light soy sauce, vinegar, honey, sesame oil, sriracha, dark soy sauce and leave aside..
  4. Using the same oil in which peanuts were fried, heat in a pan over medium flame, cook the marinated chicken in a single layer, as soon as it changes colour, dish out and keep aside..
  5. Again, in the same oil saute onions till translucent, add ginger garlic and saute till fragrant. Now add the red chilies, chicken, red and green capsicums and the sauce mix and stir well..
  6. Lastly add the cornflour slurry, mix well and turn off the flame. You do not want the veggies to discolour or soften. Dish out and garnish with fried peanuts and spring onions. Serve with rice of your choice. Enjoy!.

So that's going to wrap this up for this exceptional food kung pao chicken recipe. Thanks so much for your time. I am confident you will make this at home. There's gonna be interesting food in home recipes coming up. Don't forget to bookmark this page on your browser, and share it to your family, colleague and friends. Thanks again for reading. Go on get cooking!

Step-by-Step Guide to Make Quick The Bomb Seafood Boil!!!

Step-by-Step Guide to Make Quick The Bomb Seafood Boil!!!

The Bomb Seafood Boil!!!.

The Bomb Seafood Boil!!!

Hello everybody, hope you are having an incredible day today. Today, I'm gonna show you how to make a special dish, the bomb seafood boil!!!. One of my favorites food recipes. For mine, I'm gonna make it a little bit unique. This is gonna smell and look delicious.

The Bomb Seafood Boil!!! is one of the most popular of current trending meals in the world. It is enjoyed by millions daily. It's simple, it is fast, it tastes yummy. The Bomb Seafood Boil!!! is something that I've loved my whole life. They're nice and they look fantastic.

To begin with this particular recipe, we have to prepare a few ingredients. You can cook the bomb seafood boil!!! using 12 ingredients and 8 steps. Here is how you cook that.

The ingredients needed to make The Bomb Seafood Boil!!!:

  1. {Get 1 lb of raw shrimp, heads off and deveined, but keep shells on.
  2. {Get 1 lb of Crab legs of your choice, I use snow or dungeness.
  3. {Make ready 1 of Shellfish such as mussels or clams are optional.
  4. {Get 1 of Red potatoes, halved...as little or as many as you want.
  5. {Prepare 3 of Fresh corn on the cobs, snapped in half.
  6. {Make ready 1 packages of of whole mushrooms.
  7. {Get 1/2 of Onion, thickly sliced.
  8. {Make ready 3 of Garlic cloves, coarsely chopped.
  9. {Prepare 3 tbsp of Apple cider vinegar, this is important, it helps all the flavors soak in.
  10. {Take 1/2 of A packet of boil seasoning, can be found near the seafood at most stores.
  11. {Take 1 of Lemon squeezed in, then drop it in the boil.
  12. {Get 1 of Add salt, pepper, garlic powder, and hot sauce to taste.

Instructions to make The Bomb Seafood Boil!!!:

  1. In a large deep pot, fill a litte over 1/2 way with water and bring to a boil.
  2. Add vinegar, boil seasoning, all your spices, the onion, garlic and squeezed lemon.
  3. Once boiling, add mushrooms and potatoes, let boil for 10 minutes.
  4. Now add the corn, let boil for another 10 minutes.
  5. Add in crab legs, boil for 5 minutes.
  6. If adding shellfish, add before the shrimp, once they start opening, add the shrimp then.
  7. Add shrimp, boil for another 3-5 minutes, stirring some.
  8. Drain and serve hot, preferably with melted butter and fresh lemon wedges.

So that's going to wrap this up for this exceptional food the bomb seafood boil!!! recipe. Thanks so much for your time. I'm sure you can make this at home. There's gonna be more interesting food in home recipes coming up. Don't forget to save this page in your browser, and share it to your family, friends and colleague. Thank you for reading. Go on get cooking!

How to Prepare Quick Nina's Sweet N Tangy Looseleaf Salad

How to Prepare Quick Nina's Sweet N Tangy Looseleaf Salad

Nina's Sweet N Tangy Looseleaf Salad.

Nina's Sweet N Tangy Looseleaf Salad

Hello everybody, I hope you are having an incredible day today. Today, I'm gonna show you how to prepare a distinctive dish, nina's sweet n tangy looseleaf salad. One of my favorites food recipes. For mine, I am going to make it a bit unique. This is gonna smell and look delicious.

Nina's Sweet N Tangy Looseleaf Salad is one of the most popular of recent trending meals on earth. It's easy, it's fast, it tastes delicious. It is enjoyed by millions daily. Nina's Sweet N Tangy Looseleaf Salad is something which I have loved my entire life. They are fine and they look fantastic.

To begin with this particular recipe, we must first prepare a few components. You can cook nina's sweet n tangy looseleaf salad using 13 ingredients and 9 steps. Here is how you can achieve it.

The ingredients needed to make Nina's Sweet N Tangy Looseleaf Salad:

  1. {Get of salad.
  2. {Take 4 cup of mixed looseleaf lettuce torrn into bite sized pieces.
  3. {Take 1 of tangerine ( peeled, seeded, sectioned ).
  4. {Prepare 1/3 cup of dried cranberries or craisins.
  5. {Take 1/4 cup of raisins.
  6. {Take 1/4 cup of shredded carrots.
  7. {Make ready 1/4 cup of broken candied or sugared walnuts.
  8. {Make ready of dressing.
  9. {Make ready 1/3 cup of golden balsamic vinegar.
  10. {Get 1/3 cup of extra virgin olive oil.
  11. {Take 6 tbsp of strawberry preserves jelly.
  12. {Prepare of top with.
  13. {Take 1 of shaved parmesan to taste.

Instructions to make Nina's Sweet N Tangy Looseleaf Salad:

  1. for the salad:.
  2. cut each section of tangerine in half..
  3. layer salad in order of the ingredients listed..
  4. for the dressing:.
  5. add all ingredients into a jar and shake well!.
  6. pour over salad..
  7. top with parmesan.
  8. and serve! enjoy!.
  9. makes enough forr 2 for a meal or 4-5 as a side..

So that's going to wrap it up with this special food nina's sweet n tangy looseleaf salad recipe. Thank you very much for reading. I'm confident you can make this at home. There's gonna be more interesting food in home recipes coming up. Remember to bookmark this page on your browser, and share it to your family, colleague and friends. Thanks again for reading. Go on get cooking!

Steps to Make Any-night-of-the-week Monterey Chicken

Steps to Make Any-night-of-the-week Monterey Chicken

Monterey Chicken.

Monterey Chicken

Hey everyone, I hope you are having an incredible day today. Today, I will show you a way to make a special dish, monterey chicken. It is one of my favorites. This time, I'm gonna make it a bit unique. This will be really delicious.

Monterey Chicken is one of the most well liked of current trending foods in the world. It's easy, it is fast, it tastes yummy. It's enjoyed by millions every day. Monterey Chicken is something that I have loved my entire life. They are fine and they look wonderful.

To get started with this particular recipe, we must first prepare a few ingredients. You can have monterey chicken using 7 ingredients and 3 steps. Here is how you cook it.

The ingredients needed to make Monterey Chicken:

  1. {Take of Boneless, skinless chicken breasts.
  2. {Take of Barbecue Sauce.
  3. {Make ready of Bacon Bits.
  4. {Make ready of Shredded Colby and Jack cheese.
  5. {Prepare of Rotel tomatoes (drained).
  6. {Prepare of Green Onions (sliced).
  7. {Make ready of Pepper.

Instructions to make Monterey Chicken:

  1. Preheat oven to 400°F. Pound out chicken breasts to flatten. Season with pepper..
  2. Grill chicken until no long pink (either on a grill or in a pan for about 5 minutes on both sides) and place on baking sheet covered with foil..
  3. Top each chicken breast with one tablespoon bar-b-que sauce, 1/4 c. cheese, 1/4 c. tomatoes, green onions and one tablespoon of bacon bits. Place in oven and bake until cheese is melted (about 5 minutes)..

So that's going to wrap this up with this special food monterey chicken recipe. Thank you very much for reading. I am confident you can make this at home. There is gonna be more interesting food in home recipes coming up. Don't forget to bookmark this page in your browser, and share it to your family, friends and colleague. Thank you for reading. Go on get cooking!

Recipe of Any-night-of-the-week Baked macaroni and cheese

Recipe of Any-night-of-the-week Baked macaroni and cheese

Baked macaroni and cheese.

Baked macaroni and cheese

Hello everybody, it's Drew, welcome to my recipe page. Today, I will show you a way to prepare a distinctive dish, baked macaroni and cheese. It is one of my favorites food recipes. This time, I am going to make it a little bit tasty. This is gonna smell and look delicious.

Baked macaroni and cheese is one of the most popular of current trending foods in the world. It's simple, it is quick, it tastes delicious. It's enjoyed by millions daily. Baked macaroni and cheese is something which I have loved my entire life. They're fine and they look wonderful.

To get started with this particular recipe, we have to first prepare a few ingredients. You can cook baked macaroni and cheese using 13 ingredients and 4 steps. Here is how you can achieve it.

The ingredients needed to make Baked macaroni and cheese:

  1. {Prepare 3 tbsp of butter.
  2. {Make ready 1/2 c of flour.
  3. {Make ready 1 cup of buttermilk.
  4. {Take 1 cup of heavy cream.
  5. {Prepare 1 1/2 c of shredded cheddar.
  6. {Prepare 1 1/2 c of shredded mozzarella.
  7. {Make ready 1 tsp of garlic powder.
  8. {Take of I tsp onion powder.
  9. {Make ready 1 tsp of paprika.
  10. {Make ready 1/2 c of cream cheese.
  11. {Get 1 box of cooked macaroni noodles.
  12. {Prepare 5 slices of mild cheddar.
  13. {Make ready 6 slices of yellow American cheese.

Steps to make Baked macaroni and cheese:

  1. Cheese sauce mix together 3 tbsp melter butter and 1/2 cup of flour together in a crock pot and once combined add the heavy cream and buttermilk and the shredded cheddar and mozzarella whisk together until combined add the paprika the onion powder and the garlic powder whisk together and then let cook on low til cheese melts and sauce is rich and creamy and all cheese is melted about 20 minutes.
  2. Once sauce is done combine cooked noodles in crock pot and let cook in crock pot for 20 minutes and sauce should be thick.
  3. Remove from crockpot and add to a baking dish and put a bottom layer of noodle mixture and then add 5 slices mild cheddar and then add another layer of noodle mixture on top and then add 6 slices of yellow American cheese and then add another layer of noodle mixture.
  4. Top with Panko bread crumbs and shredded Monterey jack cheese and bake at 350 for 45 minutes.

So that is going to wrap this up with this exceptional food baked macaroni and cheese recipe. Thanks so much for your time. I am sure that you can make this at home. There is gonna be interesting food in home recipes coming up. Don't forget to save this page in your browser, and share it to your family, colleague and friends. Thank you for reading. Go on get cooking!

Steps to Prepare Homemade Easy Pad Thai with Dried Udon Noodles

Steps to Prepare Homemade Easy Pad Thai with Dried Udon Noodles

Easy Pad Thai with Dried Udon Noodles.

Easy Pad Thai with Dried Udon Noodles

Hello everybody, I hope you are having an incredible day today. Today, I'm gonna show you how to prepare a special dish, easy pad thai with dried udon noodles. One of my favorites food recipes. This time, I will make it a little bit unique. This will be really delicious.

Easy Pad Thai with Dried Udon Noodles is one of the most favored of current trending foods on earth. It is enjoyed by millions every day. It is easy, it's fast, it tastes yummy. They're fine and they look wonderful. Easy Pad Thai with Dried Udon Noodles is something that I have loved my whole life.

To get started with this recipe, we have to first prepare a few components. You can cook easy pad thai with dried udon noodles using 13 ingredients and 4 steps. Here is how you can achieve it.

The ingredients needed to make Easy Pad Thai with Dried Udon Noodles:

  1. {Get 100 grams of Dried udon noodles.
  2. {Get 4 of Shelled shrimp.
  3. {Take 2 of bunches Garlic chives.
  4. {Prepare 1/4 of Onion.
  5. {Take 1 tbsp of Dried shrimp.
  6. {Prepare 1 of Egg.
  7. {Prepare 2 tsp of ★ Oyster sauce.
  8. {Take 1 tbsp of ★ Fish sauce.
  9. {Make ready 2 tsp of ★ Lemon juice.
  10. {Get 1 tsp of ★ Brown sugar.
  11. {Make ready 1 dash of ★ Salt.
  12. {Make ready 1 tbsp of Vegetable oil.
  13. {Make ready 1/16 of Lemon (cut into wedges).

Instructions to make Easy Pad Thai with Dried Udon Noodles:

  1. Preparation: cut the garlic chives into 5 cm pieces and slice the onion finely. Make the scrambled egg. Mix the ★ ingredients..
  2. Boil the dried udon noodles for 4 minutes. Rinse in cold water and drain ..
  3. Heat the vegetable oil in a frying pan. Stir-fry the shrimp until their color changes. Then add the noodles, dried shrimp and ★ ingredients and mix everything together. Cook for 1 minute..
  4. Add the scrambled eggs, the onion and the garlic chives and stir lightly. When the onion has cooked lightly, serve on a plate with the lemon wedges..

So that's going to wrap this up for this exceptional food easy pad thai with dried udon noodles recipe. Thanks so much for reading. I am confident that you can make this at home. There's gonna be interesting food at home recipes coming up. Remember to bookmark this page in your browser, and share it to your family, colleague and friends. Thank you for reading. Go on get cooking!

Simple Way to Prepare Homemade Tomato Spaghetti With Salmon

Simple Way to Prepare Homemade Tomato Spaghetti With Salmon

Tomato Spaghetti With Salmon.

Tomato Spaghetti With Salmon

Hello everybody, hope you are having an incredible day today. Today, we're going to prepare a distinctive dish, tomato spaghetti with salmon. One of my favorites food recipes. This time, I am going to make it a bit tasty. This will be really delicious.

Tomato Spaghetti With Salmon is one of the most well liked of recent trending foods in the world. It's easy, it is quick, it tastes yummy. It is enjoyed by millions every day. Tomato Spaghetti With Salmon is something that I've loved my whole life. They're nice and they look fantastic.

To begin with this recipe, we have to first prepare a few components. You can cook tomato spaghetti with salmon using 9 ingredients and 4 steps. Here is how you can achieve that.

The ingredients needed to make Tomato Spaghetti With Salmon:

  1. {Get 4 slice of salmon.
  2. {Get 2 large of dice onion.
  3. {Make ready 15 small of cherry tomatoes.
  4. {Prepare 2 tbsp of olive oil.
  5. {Prepare 1 tbsp of tomato paste.
  6. {Take 380 grams of bottle of( barilla brand )pasta sauce.
  7. {Prepare 1 tbsp of light soy sauce.
  8. {Take 1 tbsp of worcestershire sauce.
  9. {Get 150 grams of Spaghetti.

Steps to make Tomato Spaghetti With Salmon:

  1. Season the salmon with a,dash of salt then broil it for 20 minutes on both side then set aside.
  2. In pan with oil saute the onion then pour the ready to used store bought tomato pasta sauce and bring it to a simmer then add additional 1tbsp of tomato paste and 1 tbsp each of worchestershire sauce and light soy sauce ,then add some small cherry tomato and mix well.
  3. Bring a ,pot of water to a boil then add salt and spaghetti and let it simmer for full 8 minutes or longer depending on the package instructions.
  4. Drain the pasta and immediately add onto the tomato sauce and mix well and serve with the cooked broiled salmon and enjoy.

So that's going to wrap it up for this special food tomato spaghetti with salmon recipe. Thanks so much for reading. I'm confident that you will make this at home. There is gonna be interesting food in home recipes coming up. Don't forget to bookmark this page on your browser, and share it to your family, colleague and friends. Thank you for reading. Go on get cooking!

Recipe of Favorite Bacon mac and cheese

Recipe of Favorite Bacon mac and cheese

Bacon mac and cheese. Bacon mac and cheese is one of the greatest comfort food I have ever had. It's a delicious combination of spices and cheese. Of course, as always, you can.

Bacon mac and cheese This bacon mac and cheese is so simple to make, and it only uses one pan which is always a good thing! Tyler makes the ultimate kid-friendly dish, macaroni and cheese with bacon. Bacon Mac and Cheese is a rich and creamy three cheese baked mac and cheese with bacon inside and on top.

Hello everybody, it is me, Dave, welcome to our recipe page. Today, I'm gonna show you how to prepare a special dish, bacon mac and cheese. One of my favorites. For mine, I'm gonna make it a little bit unique. This is gonna smell and look delicious.

Bacon mac and cheese is one of the greatest comfort food I have ever had. It's a delicious combination of spices and cheese. Of course, as always, you can.

Bacon mac and cheese is one of the most popular of current trending foods on earth. It is simple, it's quick, it tastes delicious. It is appreciated by millions daily. Bacon mac and cheese is something that I have loved my entire life. They are fine and they look fantastic.

To begin with this particular recipe, we must prepare a few components. You can cook bacon mac and cheese using 7 ingredients and 10 steps. Here is how you cook it.

The ingredients needed to make Bacon mac and cheese:

  1. {Get 1/2 box of elbow pasta.
  2. {Get 1/4 c of flour.
  3. {Make ready 1 pt of milk.
  4. {Get 6 slices of thick cut bacon.
  5. {Prepare to taste of Salt and pepper.
  6. {Prepare 8 oz of sharp cheddar.
  7. {Get 8 oz of montery jack cheese.

There are entire restaurants that center around the cheesy, delicious classic and serve it almost exclusively, that's how much people love their Mac. Mac and cheese may seem straightforward, but in an all-star mac, each component is carefully considered and intentionally chosen to build This Creamy Baked Macaroni and Cheese with Bacon is an excellent, extra-indulgent recipe to keep in your rotation—it's sure to please a family or a crowd. This is the perfect bacon mac and cheese for those of you who like to enjoy a big bowl for dinner and absolutely nothing else. It's beautifully flavored, creamy, cheesy, and with the smokey bite of crisp salty bacon on top??

Steps to make Bacon mac and cheese:

  1. Heat oven to 425 and cook bacon on cooking sheet for 15m..
  2. Cook pasta for 4 min. Drain but save 1/4c pasta water..
  3. Grate cheese and set aside..
  4. Put flour and milk in jar, close tight then shake until combined..
  5. Add flour and milk into pasta water on low and stir until mixed..
  6. Add small handfulls of cheese while stirring..
  7. After mixture is combined heat on medium low for five minutes, stir occansionally..
  8. Remove mixture from heat and add pasta then stir well..
  9. Pour into bake pan then cover with crumbled bacon. Cook for 20 minutes..
  10. Let cool before serving..

Oh man, you guys are in for a treat — I'm not even kidding. This recipe for bacon mac and cheese also calls for fire-roasted tomatoes and peppery arugula, so we like to think of it as a fancy, pasta-fied BLT. Mac and Cheese with Bacon and Peas. All Reviews for Bacon and Broccoli Mac and Cheese. Just made this tonight for dinner, it was a success!

So that is going to wrap it up with this special food bacon mac and cheese recipe. Thank you very much for reading. I'm sure that you will make this at home. There's gonna be more interesting food at home recipes coming up. Remember to save this page in your browser, and share it to your family, colleague and friends. Thank you for reading. Go on get cooking!

Simple Way to Make Quick Homemade lasagna sheets

Simple Way to Make Quick Homemade lasagna sheets

Homemade lasagna sheets. Make your baked lasagna taste even better with homemade pasta! A Super Recipe of Homemade Lasagna Sheets (Without Pasta Machine) by amna. Homemade Lasagna with from Scratch Noodles.

Homemade lasagna sheets And forget about blanching the sheets before baking - no precooking is required! Homemade Lasagna Sheets - There is nothing better than homemade pasta, it's fresh, you know exactly what's in it, and it always tastes good. Homemade lasagne sheets are easier to make than you think.

Hello everybody, it's Louise, welcome to my recipe site. Today, we're going to make a special dish, homemade lasagna sheets. One of my favorites. For mine, I'm gonna make it a bit unique. This is gonna smell and look delicious.

Make your baked lasagna taste even better with homemade pasta! A Super Recipe of Homemade Lasagna Sheets (Without Pasta Machine) by amna. Homemade Lasagna with from Scratch Noodles.

Homemade lasagna sheets is one of the most popular of recent trending meals on earth. It is simple, it's quick, it tastes yummy. It is enjoyed by millions daily. They're fine and they look fantastic. Homemade lasagna sheets is something which I've loved my whole life.

To begin with this particular recipe, we have to first prepare a few components. You can cook homemade lasagna sheets using 4 ingredients and 15 steps. Here is how you cook it.

The ingredients needed to make Homemade lasagna sheets:

  1. {Take of flour.
  2. {Get of salt.
  3. {Take of olive oil.
  4. {Make ready of eggs.

You don't even need a pasta machine! And forget about blanching the sheets before baking - no precooking required! Home By CuisineItalian Homemade Lasagna Sheets (Without Machine). Lasagna or Lasagne is a flat type of pasta which is used to make the signature dish, Lasagna.

Steps to make Homemade lasagna sheets:

  1. Here’s d ingredients 👇.
  2. In a clean bowl pour in your flour and add in your salt and whisk..
  3. Now create a space in the middle and pour in your eggs.
  4. Then pour in your olive oil.
  5. Mix and now pour in your water.
  6. Dust your surface and knead your dough for 2-3min.
  7. Return your dough back to the bowl and let it sit for 15min.
  8. Now cut your dough into 4 pieces.
  9. Roll out 1 part of it.
  10. Make it thin, until your fingers are a bit visible.
  11. Now cut it out into a lasagna shape sheet using a cut out carton wit a pizza cutter.
  12. Place your cut out piece on a baking paper or towel.
  13. Repeat the same steps for the rest of the dough.
  14. Now spread them out and flip the other sides for them to dry equally..
  15. And they are ready for the beef/chicken or vegetable lasagna and any other better way you think it works for you😍😍. Beef lasagna will be my next recipe upload.

I made most of it into lasagna sheet and made a small batch of linguine, cooked it for few mins and tossed that fresh pasta in a homemade tomato sauce. I try and use fresh pasta sheets for any type of lasagna I may make just because I think fresh egg pasta sheets always taste better in a lasagna than dried ones do. Be the first to review this recipe. Homemade Eggless Lasagna Sheets (Without Machine) Pasta sheets Easy Lasagna sheets No Oven Lasagna with White Sauce & Homemade Pasta Sheets Super Tasty Recipe in Urdu Hindi.

So that's going to wrap it up for this special food homemade lasagna sheets recipe. Thank you very much for your time. I'm sure that you can make this at home. There's gonna be interesting food at home recipes coming up. Remember to bookmark this page in your browser, and share it to your loved ones, colleague and friends. Thank you for reading. Go on get cooking!

Recipe of Favorite Monte Cristo Chicken bake

Recipe of Favorite Monte Cristo Chicken bake

Monte Cristo Chicken bake.

Monte Cristo Chicken bake

Hey everyone, I hope you're having an amazing day today. Today, I will show you a way to prepare a distinctive dish, monte cristo chicken bake. One of my favorites food recipes. For mine, I'm gonna make it a little bit tasty. This is gonna smell and look delicious.

Monte Cristo Chicken bake is one of the most popular of current trending meals on earth. It's enjoyed by millions every day. It's easy, it is quick, it tastes yummy. Monte Cristo Chicken bake is something which I have loved my entire life. They're nice and they look fantastic.

To begin with this recipe, we must prepare a few ingredients. You can have monte cristo chicken bake using 16 ingredients and 3 steps. Here is how you cook it.

The ingredients needed to make Monte Cristo Chicken bake:

  1. {Get of Sauce:.
  2. {Prepare 1/4 C of sour cream.
  3. {Take 1/4 C of chicken stock.
  4. {Make ready 1 Tbsp of honey.
  5. {Get 1/2 C of cream of mushroom soup.
  6. {Take 1/2 tsp of pepper.
  7. {Prepare 1/4 tsp of garlic powder.
  8. {Take 1/4 tsp of thyme (fresh or dried).
  9. {Get 1 Tbsp of chives, chopped.
  10. {Take of Chicken bake:.
  11. {Prepare 2 Tbsp of dijon mustard.
  12. {Make ready 1/2 C of uncooked rice.
  13. {Make ready 2 of large chicken breasts, pounded and cut into 4 pieces.
  14. {Get 12 slices of virginia ham or canadian bacon.
  15. {Make ready 8 slices of Swiss cheese.
  16. {Make ready 4-8 slices of extra sharp provolone, depending how much you like.

Instructions to make Monte Cristo Chicken bake:

  1. Preheat oven to 375. Mix the sauce ingredients together in a bowl and set aside. Pound the chicken breasts for an even thickness to cook evenly and cut into 4 pieces..
  2. In a cooking sprayed 9"x13" baking dish, sprinkle the rice over the bottom. Now place the 4 chicken breast pieces on top of the rice. Spread the chicken with the dijon mustard, making a nice layer on each piece. Layer the ham on the chicken. Spread the sauce mixture over top of it all. Top each piece of chicken with the cheeses..
  3. Bake covered for 40 minutes. Uncover and bake for an additional 10 minutes until golden brown and thickened. Serve..

So that is going to wrap this up for this special food monte cristo chicken bake recipe. Thanks so much for reading. I am sure you will make this at home. There is gonna be interesting food at home recipes coming up. Remember to bookmark this page on your browser, and share it to your loved ones, friends and colleague. Thank you for reading. Go on get cooking!

Simple Way to Make Favorite Easy, Accessible Pad Thai

Simple Way to Make Favorite Easy, Accessible Pad Thai

Easy, Accessible Pad Thai.

Easy, Accessible Pad Thai

Hey everyone, I hope you're having an incredible day today. Today, we're going to prepare a special dish, easy, accessible pad thai. One of my favorites food recipes. For mine, I'm gonna make it a little bit unique. This will be really delicious.

Easy, Accessible Pad Thai is one of the most favored of recent trending meals on earth. It is simple, it's quick, it tastes yummy. It's appreciated by millions daily. Easy, Accessible Pad Thai is something which I have loved my whole life. They're nice and they look wonderful.

To get started with this particular recipe, we have to first prepare a few ingredients. You can have easy, accessible pad thai using 16 ingredients and 9 steps. Here is how you can achieve that.

The ingredients needed to make Easy, Accessible Pad Thai:

  1. {Get 8 oz of pad thai noodles, (sometimes labeled as pho noodles, but get the wide ones - they're about 1/3" wide uncooked).
  2. {Make ready 2 of eggs, whisked and lightly seasoned with salt.
  3. {Make ready 2 cups of mung bean sprouts.
  4. {Get 1/2 lb. of protein of choice (I prefer shrimp or chicken), cut in bite-sized pieces and lightly seasoned w/ salt & a pinch of sugar.
  5. {Take of oil for frying.
  6. {Take 2 of green onions, cut into 1.5"long segments.
  7. {Get 4 of lime wedges to serve on the side.
  8. {Prepare of cilantro, chopped, for garnish.
  9. {Get of For the sauce:.
  10. {Prepare 3 Tablespoons of ketchup.
  11. {Get 2.5-3 Tablespoons of fish sauce.
  12. {Prepare 1 Tablespoon of lime juice.
  13. {Prepare 1 Tablespoon of Worcestershire sauce.
  14. {Get 1-2 Tablespoons of brown sugar (or white sugar if you don't have brown).
  15. {Prepare 2 cloves of garlic, minced.
  16. {Prepare 1 Tablespoon of crushed chili flakes, or to taste (I'd say this makes the dish about a 7 on the heat scale).

Steps to make Easy, Accessible Pad Thai:

  1. There are 2 options for prepping the noodles: 1) If you have time, soak the noodles in enough cold water to cover for 1 hour and then drain well. This results in a better texture. OR 2) Soak the noodles in enough hot water to cover for about 12 to 15 minutes or so, until all the noodles go completely limp when you pull them up by the handful out of the water, and drain well..
  2. Mix all sauce ingredients in a bowl and stir thoroughly to incorporate all the seasonings evenly..
  3. In a large wok or non-stick pan, bring a Tablespoon of oil up to medium high heat and saute/stir-fry your protein until cooked through. Set aside..
  4. Scramble your eggs and set aside with the other protein..
  5. Turn the heat to high, add 1 or 2 Tablespoons of oil to the pan, wait about 15 seconds to heat it up, and add in the noodles. Let the noodles sit for about 30 seconds so as not to disperse the heat then give a toss to redistribute them. Do this 3 or 4 times before adding in the rest of your ingredients. If your noodles start to stick together a little at this point, don't worry. When you add the liquid from the sauce, they'll separate again as you stir..
  6. Add in the rest of your ingredients - meat, eggs, sprouts, green onions, and sauce - and toss thoroughly to season each noodle strand..
  7. If you like some crispy/charred bits to your noodles, now is the time to add another Tablespoon of oil to the pan, and just let your noodles sit for a minute and a half to two minutes. This will crisp up some of the edges..
  8. Garnish to taste with chopped cilantro and serve with lime wedges. The added fresh lime juice gives the dish extra zip..
  9. Enjoy! :).

So that is going to wrap this up for this special food easy, accessible pad thai recipe. Thank you very much for your time. I'm confident that you can make this at home. There's gonna be more interesting food in home recipes coming up. Remember to save this page on your browser, and share it to your family, friends and colleague. Thank you for reading. Go on get cooking!

Steps to Prepare Homemade Pepperoni & Ham Filled Bread

Steps to Prepare Homemade Pepperoni & Ham Filled Bread

Pepperoni & Ham Filled Bread. Pepperoni is an American variety of salami, made from cured pork and beef seasoned with paprika or other chili pepper. This cured and fermented sausage is absolutely loaded with flavor and aroma. You can find the printable recipe on our.

Pepperoni & Ham Filled Bread

Hey everyone, hope you're having an amazing day today. Today, we're going to prepare a special dish, pepperoni & ham filled bread. One of my favorites. For mine, I am going to make it a bit unique. This is gonna smell and look delicious.

Pepperoni & Ham Filled Bread is one of the most favored of recent trending foods in the world. It's appreciated by millions daily. It is simple, it's fast, it tastes yummy. Pepperoni & Ham Filled Bread is something that I've loved my entire life. They are fine and they look wonderful.

Pepperoni is an American variety of salami, made from cured pork and beef seasoned with paprika or other chili pepper. This cured and fermented sausage is absolutely loaded with flavor and aroma. You can find the printable recipe on our.

To get started with this recipe, we must first prepare a few components. You can cook pepperoni & ham filled bread using 11 ingredients and 1 steps. Here is how you cook that.

The ingredients needed to make Pepperoni & Ham Filled Bread:

  1. {Make ready 2 of tubes of crescent rolls.
  2. {Get 12 slices of deli ham.
  3. {Take 1/2 lb of deli sandwich pepperoni.
  4. {Make ready 12 slices of provolone cheese.
  5. {Take 12 slices of swiss cheese.
  6. {Prepare 12 slices of deli turkey breast.
  7. {Make ready 1 jar of yellow peppers (didn't use them all just what I thought he would like on it).
  8. {Take 1 of thinly sliced onion.
  9. {Make ready of Italian seasoning.
  10. {Take of garlic powder.
  11. {Make ready of olive oi.

Instructions to make Pepperoni & Ham Filled Bread:

  1. Spread out the crescent dough flat on a cookie pan, start your layers with the ham, pepperoni, provolone cheese, swiss cheese, turkey breast, peppers and onions.. then sprinkle a little italain seasoning and garlic powder over the top..lay the other crescent dough crust over the top and pinch ends to seal....brush on the olive oil and sprinkle some more garlic powder and italain seasoning over the crustput in preheated 350* oven and bake till nice golden brown.. cut and serve....

So that's going to wrap this up with this exceptional food pepperoni & ham filled bread recipe. Thank you very much for reading. I am confident that you can make this at home. There is gonna be interesting food at home recipes coming up. Remember to save this page on your browser, and share it to your loved ones, friends and colleague. Thanks again for reading. Go on get cooking!

Step-by-Step Guide to Make Ultimate Chicken hot salsa

Step-by-Step Guide to Make Ultimate Chicken hot salsa

Chicken hot salsa.

Chicken hot salsa

Hello everybody, it's Louise, welcome to my recipe site. Today, we're going to make a special dish, chicken hot salsa. It is one of my favorites food recipes. For mine, I'm gonna make it a little bit unique. This will be really delicious.

Chicken hot salsa is one of the most favored of recent trending meals on earth. It is simple, it is quick, it tastes delicious. It's appreciated by millions daily. They're fine and they look wonderful. Chicken hot salsa is something that I've loved my whole life.

To get started with this particular recipe, we have to first prepare a few ingredients. You can cook chicken hot salsa using 19 ingredients and 14 steps. Here is how you cook it.

The ingredients needed to make Chicken hot salsa:

  1. {Make ready 1 of full chicken breast.
  2. {Get 3 of onions.
  3. {Prepare 3 of tomatoes + 1 tomato.
  4. {Take 3 of Capsicums.
  5. {Prepare of Salt.
  6. {Take 2 tsp of habanero sauce.
  7. {Make ready 1 cup of ketchup.
  8. {Prepare 1/3 cup of chilli garlic ketchup.
  9. {Take 1 tbsp of garlic paste.
  10. {Prepare 2 tsp of crushed red chillies.
  11. {Prepare 1 tsp of black pepper powder.
  12. {Take 2 tbsp of chicken powder.
  13. {Take of Salt.
  14. {Take 6 of Green chillies.
  15. {Prepare 5 tbsp of oil.
  16. {Get 2 tbsp of vinegar.
  17. {Prepare of Cooking time:.
  18. {Prepare 20 of minutes for cutting.
  19. {Take 25 of minutes for cooking.

Steps to make Chicken hot salsa:

  1. Wash chicken breast, clean fat from it. Now cut chicken breast into strips..
  2. Cut onions into square pieces. You can also use left over green onions white parts..
  3. Cut Capsicums into square pieces. Take out white part from it..
  4. Finely chopped 3 tomatoes to make sauce..
  5. Pour oil in a pan, add garlic paste. Bhonofy it till garlic turns golden brown..
  6. Now add chicken strips in it and bhonofy it..
  7. Add salt, black pepper powder, herbeno sauce, chicken powder and crushed red chillies. Bhonofy it for a minute..
  8. Put finely chopped tomatoes in chicken and bhonofy it..
  9. Dry out the water from it. Then add onions, Capsicums, and 1 tomato (square cut). Bhonofy for a minute. Vegetables should be crunchy..
  10. Now add ketchup, chilli garlic ketchup and mix it well..
  11. Now add vinegar, and again mix it well..
  12. At last add green chillies (cut into half) and simmer it for 5 minutes..
  13. Serve it hot with vegetables fried rice..
  14. You can change quantity of spices and ingredients according to your taste buds.**.

So that is going to wrap this up for this special food chicken hot salsa recipe. Thanks so much for your time. I'm sure that you will make this at home. There is gonna be more interesting food at home recipes coming up. Remember to bookmark this page in your browser, and share it to your family, friends and colleague. Thanks again for reading. Go on get cooking!

Easiest Way to Make Homemade Italian egg bake (Shakshuka)

Easiest Way to Make Homemade Italian egg bake (Shakshuka)

Italian egg bake (Shakshuka). The best baked eggs in the world - Shakshuka! A Middle Eastern and North African dish traditionally served up for breakfast or lunch, this can be made entirely on the stove or finished in the oven. However, bread for dunking/mopping is not optional!

Italian egg bake (Shakshuka) When ready to serve run a sharp knife through some Italian parsley and sprinkle over the Shakshuka. Serve with crusty bread to dip into the sauce. Shakshuka is an incredibly easy baked egg recipe that works just as well for brunch as it does for dinner.

Hey everyone, it's me, Dave, welcome to our recipe page. Today, we're going to prepare a distinctive dish, italian egg bake (shakshuka). One of my favorites. For mine, I will make it a little bit unique. This is gonna smell and look delicious.

Italian egg bake (Shakshuka) is one of the most popular of recent trending meals in the world. It's easy, it is quick, it tastes delicious. It is appreciated by millions daily. They're nice and they look fantastic. Italian egg bake (Shakshuka) is something that I've loved my entire life.

The best baked eggs in the world - Shakshuka! A Middle Eastern and North African dish traditionally served up for breakfast or lunch, this can be made entirely on the stove or finished in the oven. However, bread for dunking/mopping is not optional!

To begin with this particular recipe, we must prepare a few components. You can have italian egg bake (shakshuka) using 12 ingredients and 5 steps. Here is how you can achieve that.

The ingredients needed to make Italian egg bake (Shakshuka):

  1. {Take 4 oz. of Prosciutto.
  2. {Prepare 1/2 C. of Red onion, chopped.
  3. {Make ready 1/2 C. of Fresh oregano, chopped.
  4. {Get 1/2 C. of Fresh basil, chopped.
  5. {Make ready 1/4 C. of Milk.
  6. {Prepare 2/3 C. of Shredded or grated parmesan cheese.
  7. {Get 1/2 tsp. of Garlic, minced.
  8. {Get 1/4 tsp. of Sea salt and pepper, each.
  9. {Take 1/2 C. of Fresh tomato, chopped.
  10. {Prepare 1 C. of Tomato sauce.
  11. {Get 5 of large eggs.
  12. {Take of Red pepper flakes for garnish.

Smoky, sweet peppers combine with rich, creamy eggs and tangy yoghurt and salty feta for a completely moreish dish. Shakshuka features poached eggs in a hearty tomato pepper sauce. If you've ever had Italian "eggs in purgatory" or Turkish menemen, the dishes are all quite similar. You can't go wrong serving shakshuka for breakfast or brunch.

Steps to make Italian egg bake (Shakshuka):

  1. Preheat oven to 425° F..
  2. Pan fry the prosciutto and onion together over medium heat in a cast iron skillet until prosciutto is crisp and onions softened. Remove from heat..
  3. Whisk together the milk, and parmesan cheese. Stir in the garlic, salt and pepper, tomato, tomato sauce, and herbs..
  4. Pour the mixture over the prosciutto and onions. Create 5 small wells in the pan and crack eggs into each. Add extra parmesan ontop of eggs and place in oven 15 -18 minutes until whites are set but yolks are still runny..
  5. Garnish with red pepper flakes.

Eggs in purgatory is soft-cooked eggs in a spicy tomato sauce. This Italian shakshuka recipe uses a handful of ingredients and is perfect for brunch! Just imagine the soft-cooked eggs simmered in slightly fiery tomato sauce loaded with herbs and garlic. Shakshuka, Eggs in Purgatory- call it what you like, the essence is the same here: eggs poached in tomato sauce. Shakshuka is the middle eastern version But this isn't quite a classic Shakshuka, nor is it a classic Eggs in Purgatory.

So that is going to wrap this up for this special food italian egg bake (shakshuka) recipe. Thank you very much for reading. I'm confident you can make this at home. There is gonna be more interesting food at home recipes coming up. Remember to bookmark this page in your browser, and share it to your loved ones, friends and colleague. Thank you for reading. Go on get cooking!

Simple Way to Prepare Super Quick Homemade Special Bibingka

Simple Way to Prepare Super Quick Homemade Special Bibingka

Special Bibingka.

Special Bibingka

Hello everybody, I hope you're having an amazing day today. Today, we're going to make a special dish, special bibingka. One of my favorites. This time, I will make it a bit unique. This is gonna smell and look delicious.

Special Bibingka is one of the most favored of current trending meals on earth. It is enjoyed by millions daily. It is simple, it's quick, it tastes yummy. Special Bibingka is something that I've loved my entire life. They are nice and they look fantastic.

To get started with this recipe, we have to prepare a few ingredients. You can cook special bibingka using 10 ingredients and 11 steps. Here is how you can achieve it.

The ingredients needed to make Special Bibingka:

  1. {Get 1 cup of rice flour.
  2. {Make ready 3/4 cup of granulated sugar.
  3. {Make ready 2 tsp of baking powder.
  4. {Take 3 of medium eggs, room temperature.
  5. {Get 1 cup of coconut milk.
  6. {Make ready 1/4 cup of fresh or whole milk.
  7. {Take 1/4 cup of softened butter.
  8. {Prepare of plus extra for coating.
  9. {Take of grated cheese for toppings, salted egg, sliced or cream cheese, sliced, ham.
  10. {Take of few pieces banana leaves​.

Instructions to make Special Bibingka:

  1. Combine butter and sugar together while whisking then add the eggs..
  2. Gradually add the rice flour and baking powder..
  3. Add the coconut milk and fresh milk. Beat well until smooth..
  4. Line molds or round pans with pliable banana leaves (brushed with butter)..
  5. Pour mixture in the prepared molds or muffin pans..
  6. Bake in (preheated) oven 375 degrees F for 20 minutes..
  7. Remove from oven..
  8. Top with sliced salted eggs and ham..
  9. Bake again for 10-15 minutes or until the color of top turns medium brown..
  10. Remove from oven. Brush some butter on top if desired..
  11. Serve with grated coconut or cheese!.

So that's going to wrap it up with this exceptional food special bibingka recipe. Thanks so much for reading. I'm confident that you will make this at home. There's gonna be more interesting food at home recipes coming up. Don't forget to save this page on your browser, and share it to your family, colleague and friends. Thank you for reading. Go on get cooking!

Easiest Way to Prepare Homemade Grilled Jerk Chicken

Easiest Way to Prepare Homemade Grilled Jerk Chicken

Grilled Jerk Chicken.

Grilled Jerk Chicken

Hey everyone, it is Jim, welcome to our recipe site. Today, I will show you a way to make a distinctive dish, grilled jerk chicken. One of my favorites food recipes. This time, I'm gonna make it a bit unique. This will be really delicious.

Grilled Jerk Chicken is one of the most popular of current trending meals on earth. It is enjoyed by millions every day. It is simple, it's quick, it tastes delicious. Grilled Jerk Chicken is something that I have loved my whole life. They're fine and they look wonderful.

To begin with this recipe, we must prepare a few ingredients. You can cook grilled jerk chicken using 14 ingredients and 7 steps. Here is how you cook it.

The ingredients needed to make Grilled Jerk Chicken:

  1. {Make ready 4-6 of each chicken, breast or thighs 6 oz. each (delicious with pork :).
  2. {Make ready of salt -to lightly season the chicken before it is marinaded.
  3. {Make ready 2-3 ounces of lime juice-fresh is best- 2-3 limes.
  4. {Take 3 ounces of oil.
  5. {Take 1/4 teaspoon of ginger,powdered or 1 tablespoon fresh peeled and chopped.
  6. {Take 3 cloves of garlic-chopped.
  7. {Get 1/4 teaspoon of cinnamon.
  8. {Get 1/4 teaspoon of allspice.
  9. {Make ready 1/4 teaspoon of black pepper.
  10. {Prepare 1/4 teaspoon of paprika.
  11. {Get 3 tablespoons of brown sugar.
  12. {Get 1 teaspoon of salt.
  13. {Make ready 1 of each scotch bonnet or habanero chilies wear gloves and take out the seeds for less heat.
  14. {Get 2 tablespoons of cilantro -no stems.

Steps to make Grilled Jerk Chicken:

  1. Season the chicken lightly with salt.
  2. Mix the entire jerk marinade ingredients in the blender or food processor and puree for 1 minute..
  3. Place the chicken and jerk marinade in a 1 gallon zip-lock bag and let sit for at least 1 hour more time adds more flavor. (This can marinate overnight).
  4. Remove the chicken from the marinade an save the leftover marinade...you can brush the chicken with it just before you are done grilling..
  5. On a moderate heated grill Cook until the the chicken has an internal temperature of 165 -170 degrees F.. Use the left over marinade and brush over the chicken 3 minutes before it is finished..
  6. Cooking Notes -We also did this in a 350 degree oven and had very good results. Charcoal grill is my favorite !!!.
  7. .

So that is going to wrap this up for this special food grilled jerk chicken recipe. Thank you very much for reading. I am sure you can make this at home. There's gonna be more interesting food in home recipes coming up. Don't forget to save this page in your browser, and share it to your family, colleague and friends. Thank you for reading. Go on get cooking!

Simple Way to Prepare Super Quick Homemade Grilled bacon wrapped
meatloaf

Simple Way to Prepare Super Quick Homemade Grilled bacon wrapped meatloaf

Grilled bacon wrapped meatloaf.

Grilled bacon wrapped meatloaf

Hello everybody, I hope you are having an amazing day today. Today, I'm gonna show you how to prepare a special dish, grilled bacon wrapped meatloaf. One of my favorites. This time, I'm gonna make it a little bit tasty. This is gonna smell and look delicious.

Grilled bacon wrapped meatloaf is one of the most well liked of current trending foods on earth. It's easy, it is quick, it tastes yummy. It is enjoyed by millions daily. Grilled bacon wrapped meatloaf is something which I've loved my entire life. They're nice and they look wonderful.

To begin with this recipe, we have to prepare a few components. You can have grilled bacon wrapped meatloaf using 12 ingredients and 3 steps. Here is how you can achieve that.

The ingredients needed to make Grilled bacon wrapped meatloaf:

  1. {Prepare 1 medium of Onion.
  2. {Get 1 cup of Loosely packed fresh parsey.
  3. {Prepare 5 clove of Garlic, peeled.
  4. {Make ready 1 of Egg.
  5. {Prepare 1/4 cup of Ketchup.
  6. {Take 1 1/4 tsp of Salt.
  7. {Get 1 tsp of Black pepper.
  8. {Make ready 1 1/2 lb of Lean ground beef.
  9. {Prepare 8 oz of Ground pork.
  10. {Prepare 2 oz of Parmesan cheese.
  11. {Make ready 7 slice of Low sodium bacon.
  12. {Get 1/4 cup of Pure maple syrup.

Instructions to make Grilled bacon wrapped meatloaf:

  1. Prepare grill. For meatloaf, combine onion, parsley, garlic, egg, ketchup, salt and pepper in a manual food processor til finely chopped. Transfer mixture to a 6 qt. Mixing bowl add beef, pork and cheese, mix gently until combined.
  2. Place meat onto cutting board or counter form into a loaf. Arrange bacon slices crosswise over meat loaf, tucking ends under meatloaf.
  3. Transfer meat loaf to a bbq roasting pan. Place on grill covered, 70 mins or until temp is 160. Brush meatloaf with syrup during the last 5 minutes. Take off let stand.

So that is going to wrap it up with this special food grilled bacon wrapped meatloaf recipe. Thank you very much for your time. I'm sure you will make this at home. There is gonna be interesting food in home recipes coming up. Don't forget to save this page in your browser, and share it to your family, colleague and friends. Thank you for reading. Go on get cooking!